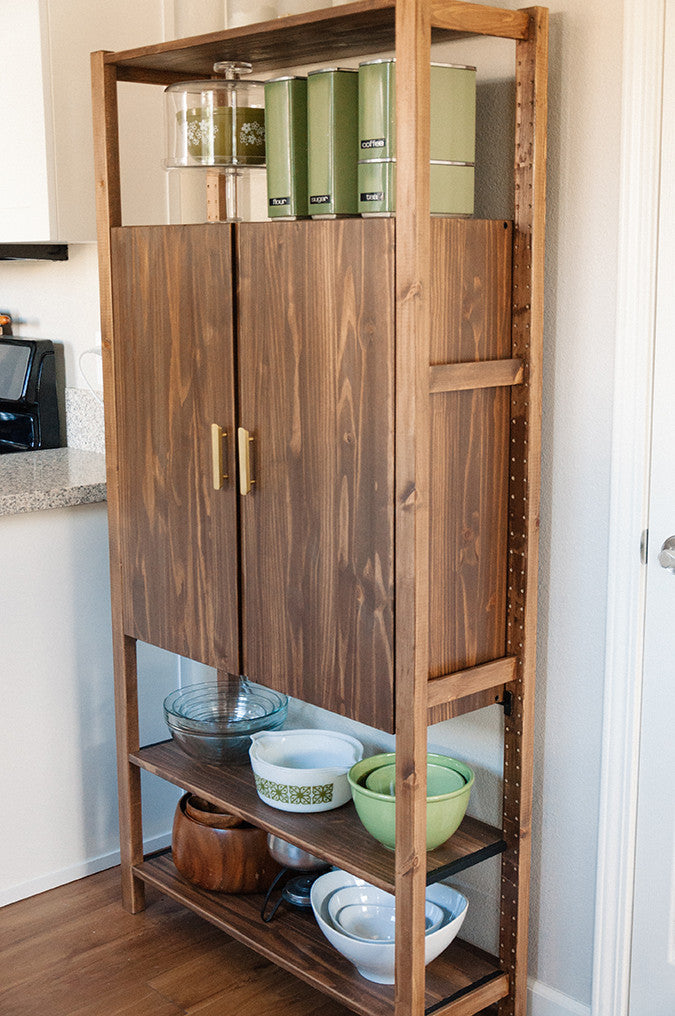
 I while back I switched from a laptop to a desktop, but with no desk for it to sit at my iMac lived at our kitchen table for months. The only real place where a desk would work in our apartment was a space next to our kitchen, but at the time we already had a shelving unit there offering up valuable kitchen storage. I didn't want to lose the shelving so I came up with the idea to create a shelving unit/computer desk out of the IVAR Shelving Unit from IKEA.
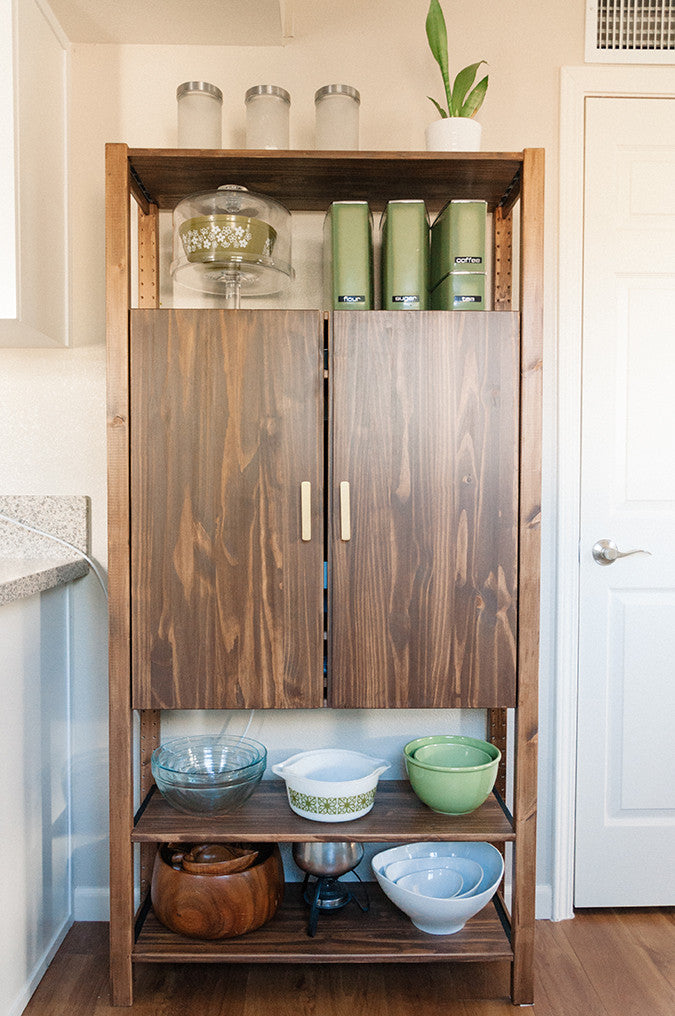
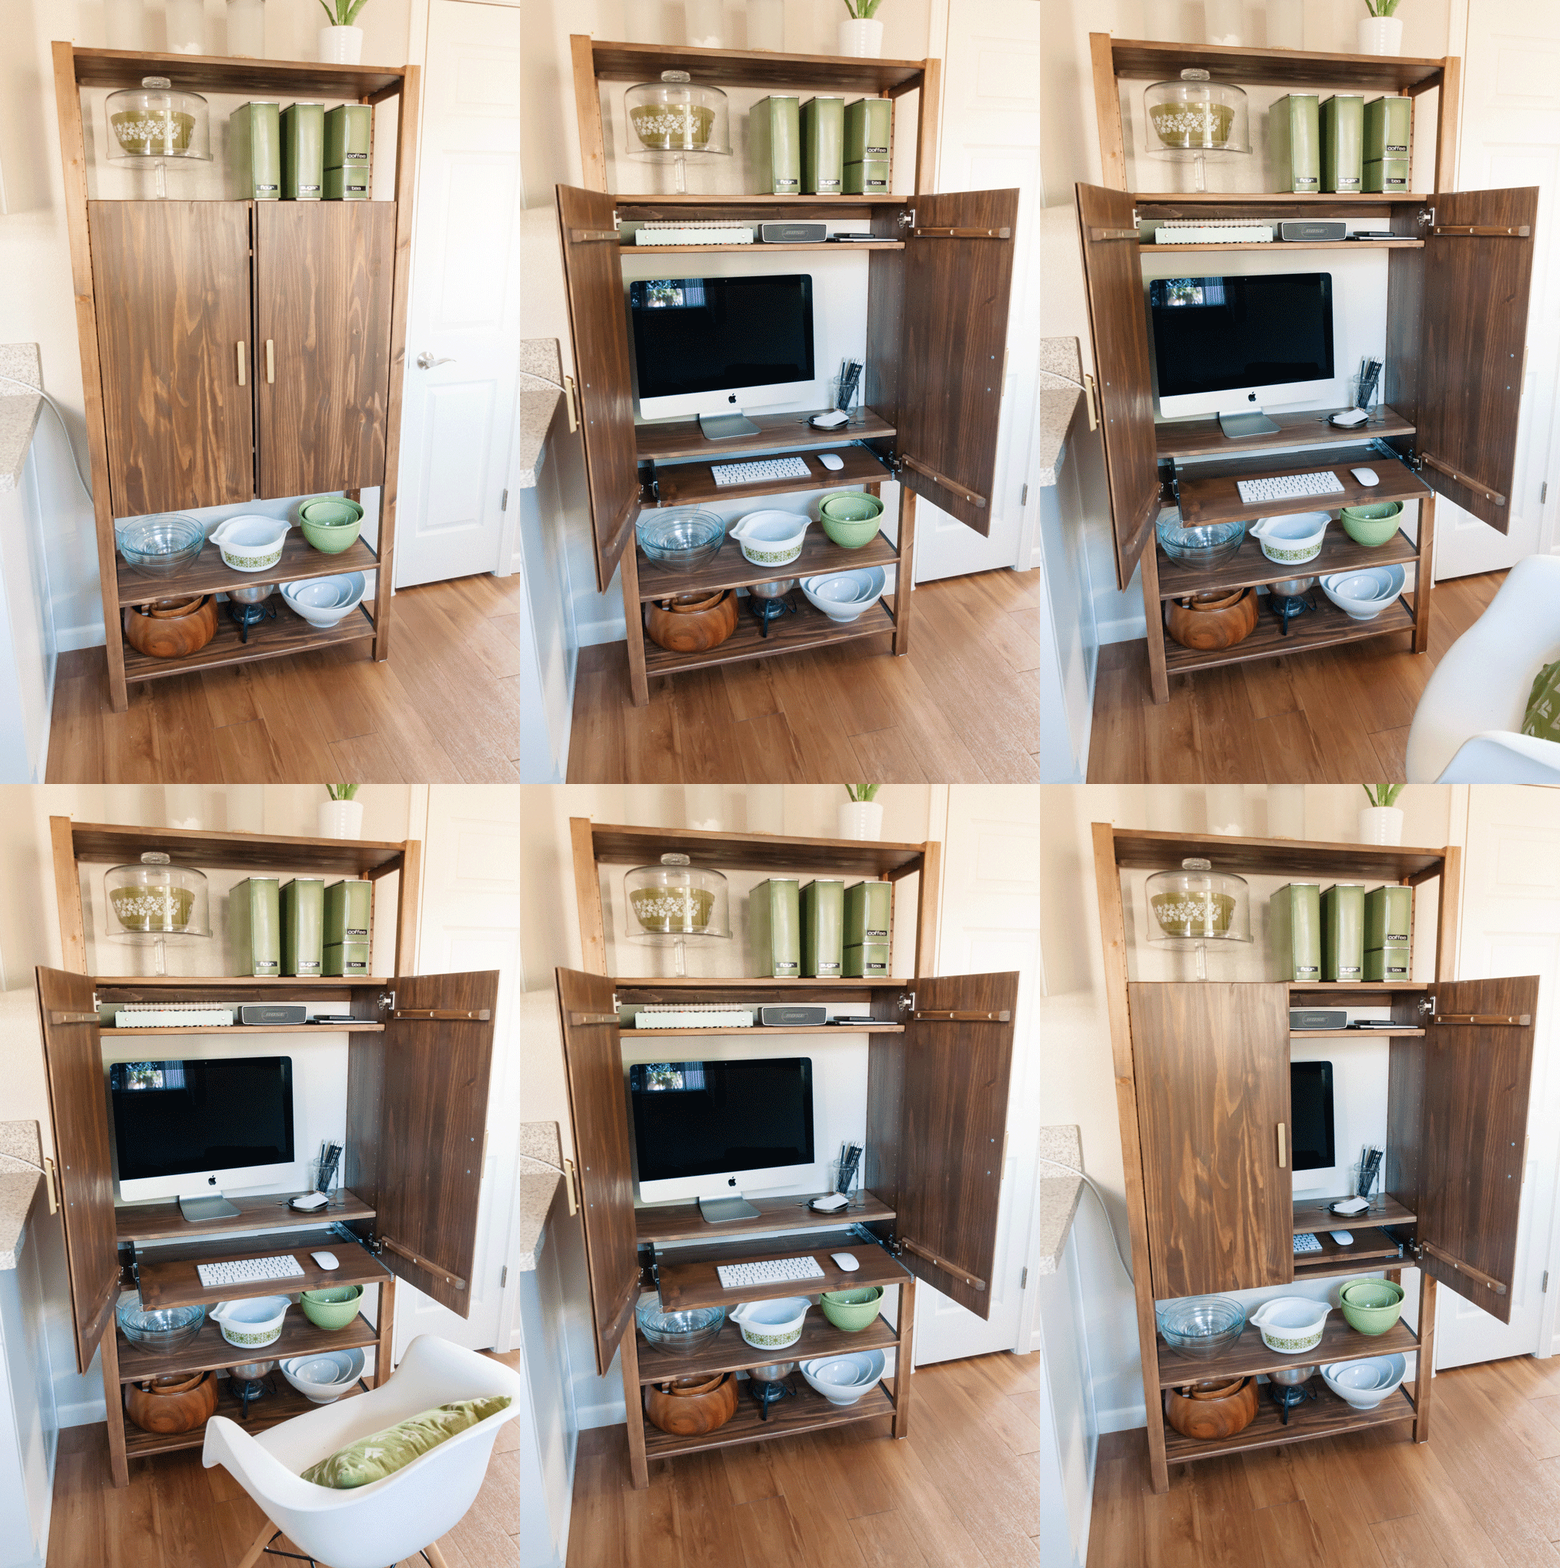 I've been using the desk for about a month now and I am really happy with it. I love that it still offers open kitchen storage, that I can hide away my computer when I'm not using it, and that Drew and I can finally use our kitchen table again. I think the walnut stain, clean lines, and brass details give it a Mid Century Modern vibe that goes well with the rest of our decor. Plus, I am always a fan of furniture pieces that serve multiple purposes and save us space in our small apartment. So for the full explanation of how I did it, keep reading!

YOU MAY ALSO LIKE: DIY HAIRPIN LEG COFFEE TABLE
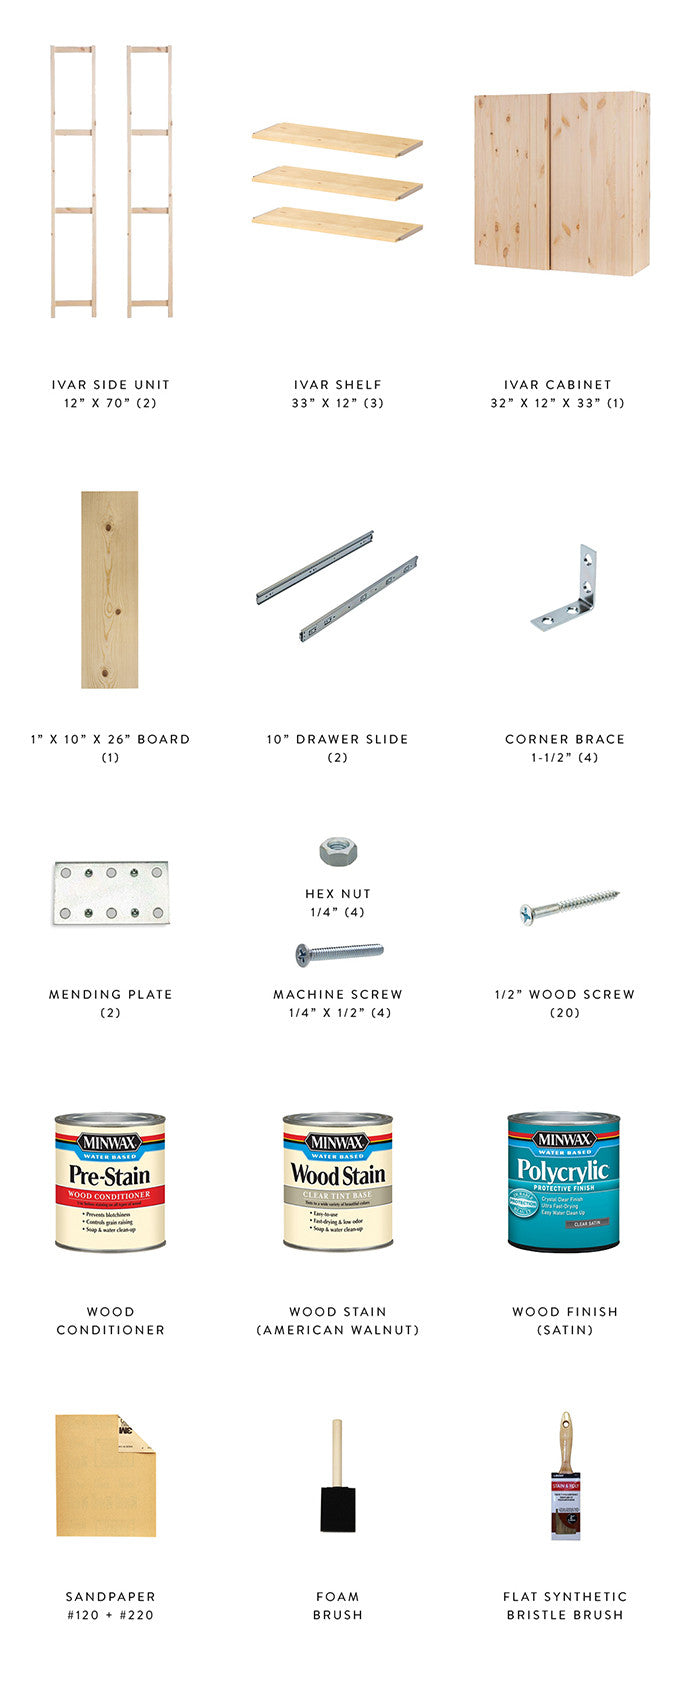
Materials
Ikea Furniture Pieces
Lumber/Hardware
- 1" x 10" x 4' Board cut to 26" length
- 10" Side mount, ball bearing drawer slides
- 1-1/2" Corner Brace (4)
- Mending Plate (2)
- 1/4" Hex Nuts (4)
- 1/4" x 1/2" Machine Screws (4)
- 1/2" Wood Screws (16)
- Drill
- Hole Saw big enough for your computer cord
Stain
- Minwax Water Based Wood Conditioner
- Minwax Water Based, Clear Tint Wood Stain - American Walnut
- Minwax Water Based Polycrylic Protective Finish - Satin
- Sand Paper - 120 and 220 grit
- Foam Brushes
- High Quality Synthetic Bristle Brush
- Clean rags or paper towels
OTHER
- Chalkboard Paint
- Small Paint Brush
- Contact Paper
- Door Handles
- Gorilla Glue
 Instructions
Step 1: Assemble the Cabinet
Assemble the cabinet per the IKEA instructions, but hold off on inserting the shelves or attaching the doors.
Step 2: Prepare, Stain, And Finish All Pieces
So I am now completely obsessed with water based stains and finishes. I stained and finished everything inside my apartment with very little ventilation, no nasty smell, and I was able to clean all of my brushes with just soap and water! I don't think I'm every going back to oil based. Anyway there is my 2-cents, now back to the instructions.
Sand
Sand all of the pieces, including the 1" x 10" x 26" board, starting with #120 sandpaper, and finishing with #220. Then wipe clean with a damp cloth and let dry.
Wood Conditioner
- Thoroughly stir wood conditioner.
- Apply wood conditioner with a foam brush. Allow to penetrate 1-5 minutes. I worked in small groups to make sure I didn't let the wood conditioner sit on any one piece for too long.
- Remove excess with a clean cloth or paper towel.
- Let dry for 15-30 minutes, then lightly sand the surface with #220 sandpaper to smooth any raised grain. Remove any dust.
Stain
- Apply the stain with a foam brush and allow to penetrate no longer than 3 minutes. I actually wiped the stain off almost immediately, you DO NOT want it to sit for very long because it dries very fast, and you don't want it to dry on the wood. Working in small areas at a time works best.
- Remove any stain that has not penetrated the wood with a clean cloth. Wipe in the direction of the grain making sure to use even pressure. Make sure the cloth you use to wipe off the stain doesn't become saturated otherwise it won't soak up the stain and will cause streaking. Continually move to a clean piece of cloth or switch to a new cloth. I went through a ton of paper towels during this process and afterwards I wished I had used reusable rags considering they could have been easily cleaned up with soap and water.
- Wait 2 hours before you apply the finish.
Finish
- STIR the finish, don't shake, otherwise you will get bubbles.
- Apply a thin coat of finish with a high-quality synthetic bristle brush. Move in the direction of the grain and try not to over brush. Watch out for any drips.
- Let dry at least 2 hours then sand with #220 sand paper and remove all dust.
- Apply a second coat. The can recommends 3 coats but I stopped at 2.
- Allow 3 hours before light handling and 24 hours before normal use.
Step 3: Glue Cabinet Brackets
When I first assembled the shelving unit I was a little disappointed with how rickety it was. So I took a few extra steps to make it more stable. Gluing the cabinet brackets in place with Gorilla Glue made the whole piece feel so much sturdier. Determine where your brackets need to go on the side rails for you cabinet to be at your desired height, and glue the brackets into the holes. I placed my brackets in the 18/19th holes from the bottom of the side units. Tape the brackets in place with masking tape as they dry, and wait 24 hours before moving on to assembly.
PS: I actually glued the brackets into place BEFORE I stained the wood but it made it harder to sand and stain, so I recommend doing it afterward.
Step 4: Assemble Shelving Unit
Once your Gorilla Glue has dried for 24 hours, assemble the shelving unit per the IKEA instructions, but hold off on inserting the shelves inside the cabinet. This is a lot easier to do with two people.
Step 5: Reinforce Cabinet
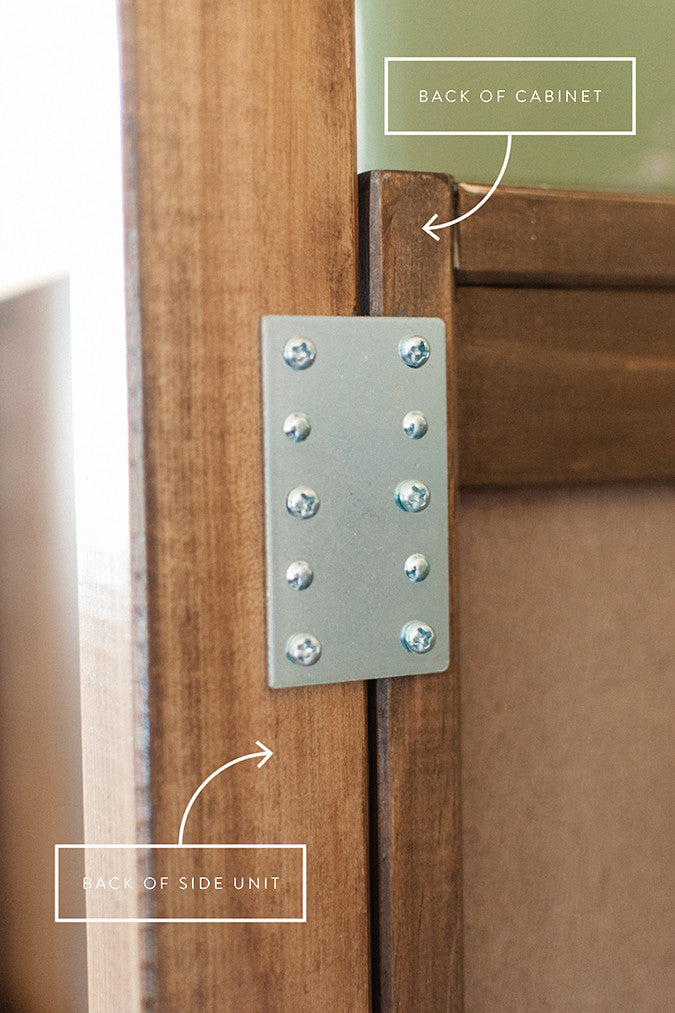
For more added stability I used mending plates to attach the back of the cabinet to the back of the side units.
 Step 6: Install Keyboard
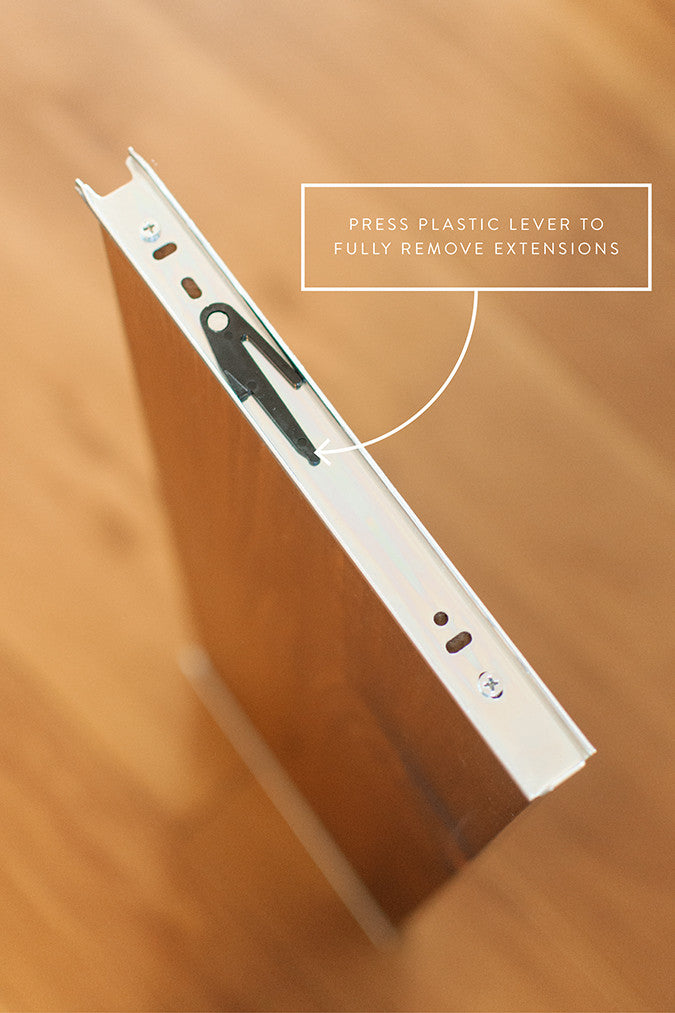
- Fully remove the extensions from the drawer slides by extending the slides all the way and pressing the plastic lever while pulling out the extensions, then attach the extensions to the sides of your 1" x 10" x 26" board with wood screws.
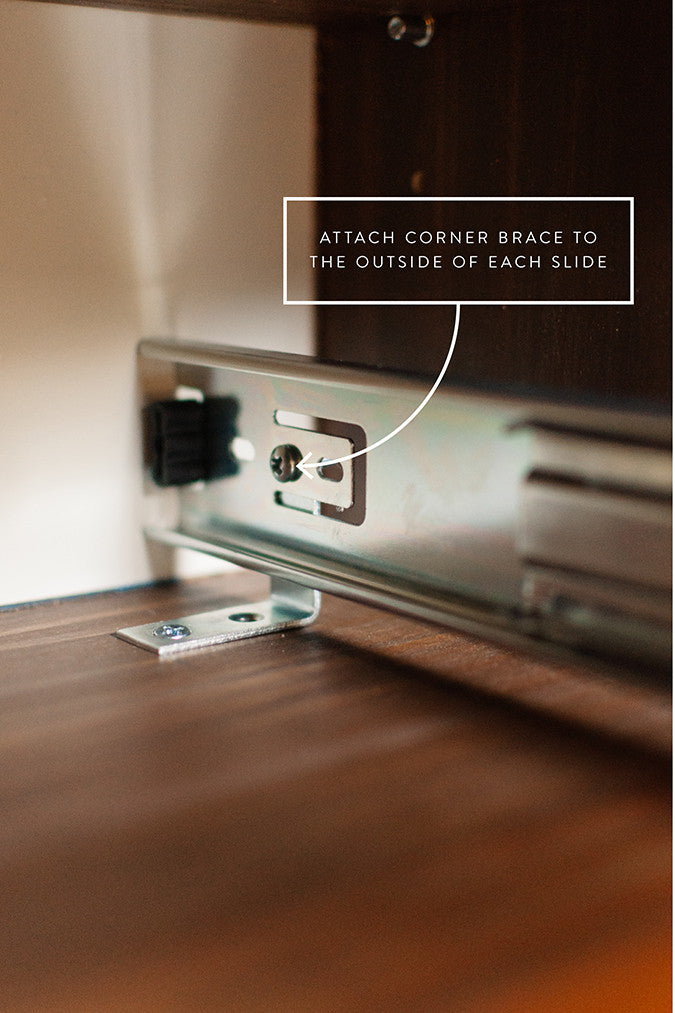
- Attach 2 corner braces to the outside of each slide at both the front and back holes using the machine screws and hex nuts.
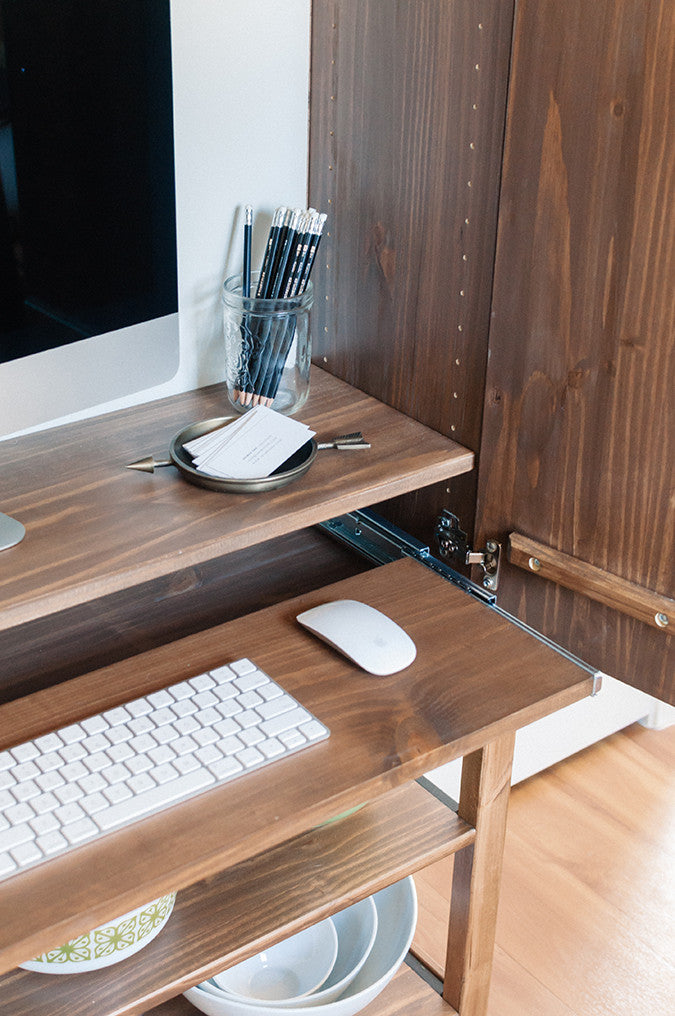
- Reinsert the keyboard into the slides with corner braces attached and position on the bottom of the cabinet. Once in position pull the keyboard out far enough so you can attach the corner braces to the bottom of the cabinet with wood screws.
STEP 7: Drill Cord Hole
- Install the shelves at your desired height in the cabinet and decide on a placement for your computer so you can figure out where to drill a hole for the cord.
- Use the size of your computer's plug to determine the size hole saw you need.
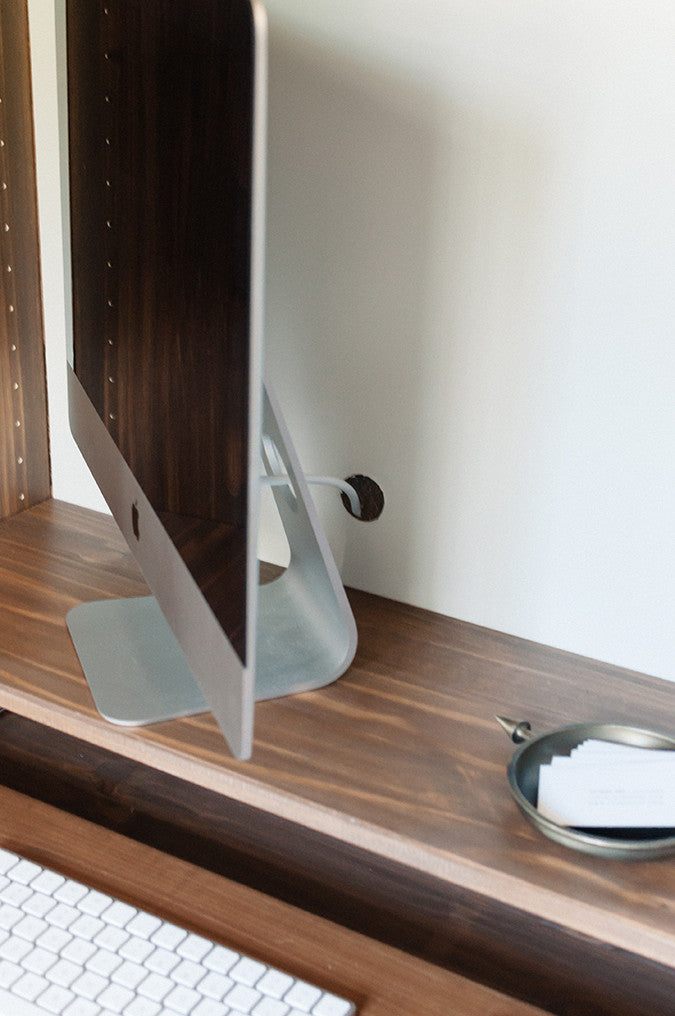
- Use the drill and hole saw to cut a hole in the cabinet backing where you want your cord to go.
 Optional Step 8: Details
To finish off the cabinet I added contact paper to the back to brighten it up and cover the ugly backing. I also painted all of the visible exterior screws, cabinet brackets, and the plastic edges of the shelves with black chalkboard paint to make them stand out less (it was the only black paint I had on hand, but I like the matte finish it achieved). Finally I finished the doors with some brass handles I found at Target.
Cost Breakdown
The cost of the IVAR pieces including tax was around $134. That cost, combined with all of the stain (which ended up being more expensive than I anticipated), additional materials, and hardware, came out to roughly $250.
Considering this is a custom, solid wood cabinet bookcase (which would have probably cost me close to $1000 to buy ready-made), I think $250 is a steal.
You May Also Like: How to Fit a Home Office in a Small Space
Subscribe to our newsletter:

 Instructions
 Step 6: Install Keyboard
 Optional Step 8: Details
Wonderful!
I am downsizing and clearing clutter, this is perfect for a little section of my livingroom.
Thank you!